Hello, OpenCode
OpenCode is an open-source AI coding agent that runs in your terminal. You can ask it to inspect files, make changes, run tests, use Git, and report back with evidence about what it actually did.
–
For AI-assisted coding, there are three widely used workflows: chat, IDE, and CLI.
- A chat interface is useful for brainstorming, asking questions, comparing approaches, reading about unfamiliar concepts, or sketching out a plan before touching code. But it is not a great option for actual implementation work because the human has to be in the loop and copy code out of the chat, deploy manually, and copy context back into the chat.
- An IDE-based workflow (e.g. Cursor, Antigravity) is strong for local code reading, autocomplete, refactoring, and making fast in-file changes while you stay in the editor and supervise. It is especially good for a workflow where the human plans to also write and modify code, instead of only giving instructions to the AI agent. IDE agents can sometimes also run tests, terminal commands, and other validation steps, but the IDE interaction model is still focused on the editor, with operational validation more of an afterthought.
- A CLI agent (e.g. OpenCode, Claude Code, Codex CLI) is great for explicit execution across the whole development workflow. If you want a coding agent to write or modify code, deploy it using shell commands, and verify that it worked, a CLI workflow is often most natural.
While there are several widely used CLI agent harnesses, we will use OpenCode, for practical reasons:
- It uses a bring-your-own-provider model. You are not locked into one model company, one subscription, or one billing path. You can connect different providers from a very extensive list, choose models based on cost or capability, and switch when your needs change.
- It works well in teaching and experimentation settings because students can combine sponsored access, paid accounts, and free providers.
Installing OpenCode
OpenCode is open source software. It is developed and distributed at https://github.com/anomalyco/opencode.
It is available for Windows, Mac, and Linux. Follow the OpenCode installation instructions for your specific platform: https://opencode.ai/docs/#install.
Learning OpenCode
Before launching opencode, navigate to the directory that you want to edit code in. (For example, a local copy of the repository you have cloned with git clone.) The default permissions allow opencode to modify files in the directory that it has been launched in; for file access outside that directory, it is supposed to ask for permission. (It is usually a good practice to deny permission for file access outside the designated directory, unless you are sure it is OK.)
Then, you should be able to launch it by running
opencode
in a terminal.
OpenCode itself comes with a rotating selection of free models through its OpenCode Zen provider. You can see which models are currently free on their pricing page.
You don’t need to create an account, let alone attach a payment method, to use these free models - however,
- they are subject to a rate limit, which you will run into if using them heavily
- and, these models are offered for free in exchange for using your data for model training or other improvements. (See privacy statement.)
In the OpenCode TUI, either
- type
/modelsand hit Enter - or Ctrl+X and then M
to switch models. Try chatting with a few different models.
OpenCode is primarily designed for command line use, so it’s helpful to know a few keyboard shortcuts:
| Action | Shortcut |
|---|---|
| Insert a newline in the prompt without submitting | Ctrl+J |
| Submit the prompt | Enter |
| Open the general menu | Ctrl+P |
| Switch between Plan mode and Build mode | Tab |
| Switch models | /models or Ctrl+X, then M |
| Copy text | Your terminal’s normal copy shortcut |
| Paste text | Your terminal’s normal paste shortcut |
Copy and paste shortcuts are handled by your terminal, so they vary by platform. For example, many Linux terminals use Ctrl+Shift+C and Ctrl+Shift+V, while macOS terminals often use Cmd+C and Cmd+V.
If you really hate working at the command line, opencode is also available in a browser-based interface, if you start it with opencode web!
Setting up the OpenCode configuration file
If you are just planning to work with these free OpenCode models, you won’t need to configure anything else! But many users will want to configure other providers. To do so, you’ll need to first set up your OpenCode configuration file.
You can use the global configuration file for your platform, or create an opencode.json in the project directory where you run OpenCode. See the OpenCode configuration documentation for the global file location. But, iff you create a project-level configuration file, it is very important to add it to .gitignore. Provider configuration files can contain API keys and should not be committed to Git.
Create an opencode.json with this starting content:
{
  "$schema": "https://opencode.ai/config.json",
  "provider": {

  }
}
Each provider section below gives you an entry to add inside the provider object. You can add providers in any order or skip providers you do not need/intend to add.
Free providers
The OpenCode provider, gives you access to some free models - but with usage limits. You can add multiple free/paid providers to OpenCode and switch between them when one provider reaches its limit. This lets you keep working while another provider is unavailable, or if you have exhausted the limit of a paid subscription.
Kilo AI
Kilo AI supports anonymous access, so you don’t need to create an account or attach a payment method. Anonymous access is limited to 200 requests per hour per IP address.
Kilo also provides a “free model router”: its router chooses a free model for each request, so you don’t choose the model yourself. However, like OpenCode Zen’s free models, these models are offered in exchange for using your data for model training, so don’t send private or sensitive information.
To add Kilo AI to OpenCode, open the opencode.json configuration file described in Setting up the OpenCode configuration file and add this entry inside the provider object.
"kilo-anon": {
  "npm": "@ai-sdk/openai-compatible",
  "name": "Kilo Anonymous",
  "options": {
    "baseURL": "https://api.kilo.ai/api/gateway"
  },
  "models": {
    "kilo-auto/free": {
      "name": "Kilo Auto Free"
    }
  }
},
Close and re-open OpenCode. Use /models to select Kilo Auto Free under the Kilo Anonymous provider, and send a test message to confirm that it works.
OpenRouter
OpenRouter is a platform that aggregates multiple AI model providers. Its openrouter/free model routes each request to a free model that supports the input you provide. For example, if you paste an image, it selects a free model that supports image input.
You can see which models are currently free in the OpenRouter model listing.
As with Kilo, OpenRouter may route your requests to providers that log prompts and outputs and use them to improve their services, e.g. for training. Do not submit personal or confidential data. You can configure your privacy settings at https://openrouter.ai/settings/privacy - for example, you can disable the Allow free endpoints that publish prompts option.
Unlike Kilo, OpenRouter does not support anonymous use, so you will have to create an account, although you do not have to attach any payment method. To use OpenRouter, go to https://openrouter.ai/ and sign up. You don’t need to attach a payment method. Once you have an account, create an API key:
- click on your profile icon in the top right
- choose Settings
- choose API Keys
- and Create
Copy the key, and save it in a safe place. Then edit the opencode.json configuration file described in Setting up the OpenCode configuration file.
Note: If you use a project configuration file, add it to your
.gitignore. The file will contain your OpenRouter API key and should not be added to your Git repository.
Add this entry inside the provider object, replacing xxxxxxxxxxxxxx with your API key.
"openrouter": {
  "npm": "@ai-sdk/openai-compatible",
  "name": "OpenRouter",
  "options": {
    "baseURL": "https://openrouter.ai/api/v1",
    "apiKey": "xxxxxxxxxxxxxx"
  },
  "whitelist": [
    "openrouter/free"
  ],
  "models": {
    "openrouter/free": {
      "name": "OpenRouter Free"
    }
  }
},
Close and re-open OpenCode. Use /models to select OpenRouter Free under the OpenRouter provider. Free usage is subject to a rate limit of 50 requests per day.
Github Copilot for Students
Verified students can use the free GitHub Copilot Student plan. It includes unlimited code completions in VS Code, plus limited chat and agent usage.
Student plan users access models through automatic model selection, so you cannot choose a specific model in OpenCode.
To activate the student benefit:
- Go to GitHub Education benefits.
- If GitHub has not verified you as a student, choose Start an application and complete the verification process.
- Under Free GitHub developer resources for students and teachers, choose Learn more and follow the prompts to activate Copilot Student.
After activating Copilot Student, connect it to OpenCode:
- In the OpenCode TUI, type
/connectand hit Enter. - Search for and choose GitHub Copilot.
- Open https://github.com/login/device in your browser and enter the code OpenCode displays.
- After authorization completes, use
/modelsto select a GitHub Copilot model.
Copilot gives you a monthly allowance of usage. You can check how much of your allowance is exhausted, and when your usage resets, in your billing settings.
Google Gemini
Google provides a free tier for the Gemini API. To use it in OpenCode, create an API key in Google AI Studio.
-
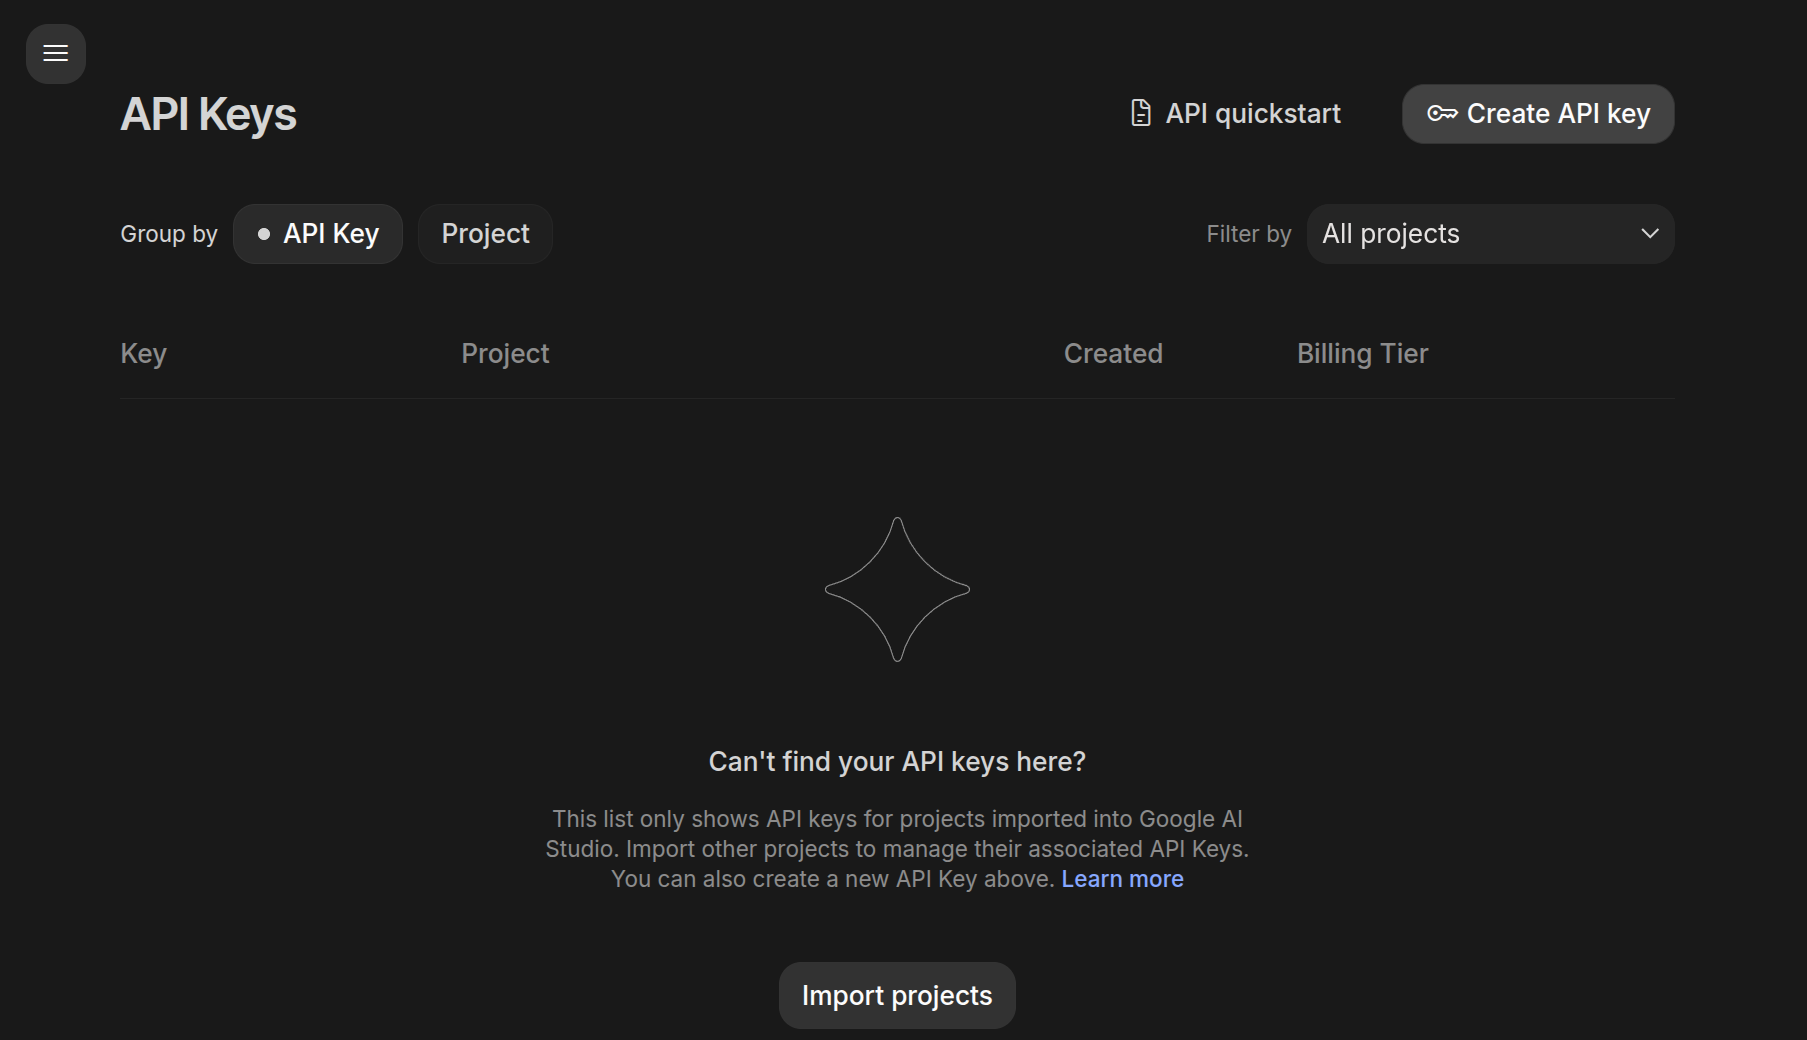
Open the API Keys page and click Create API key.
-
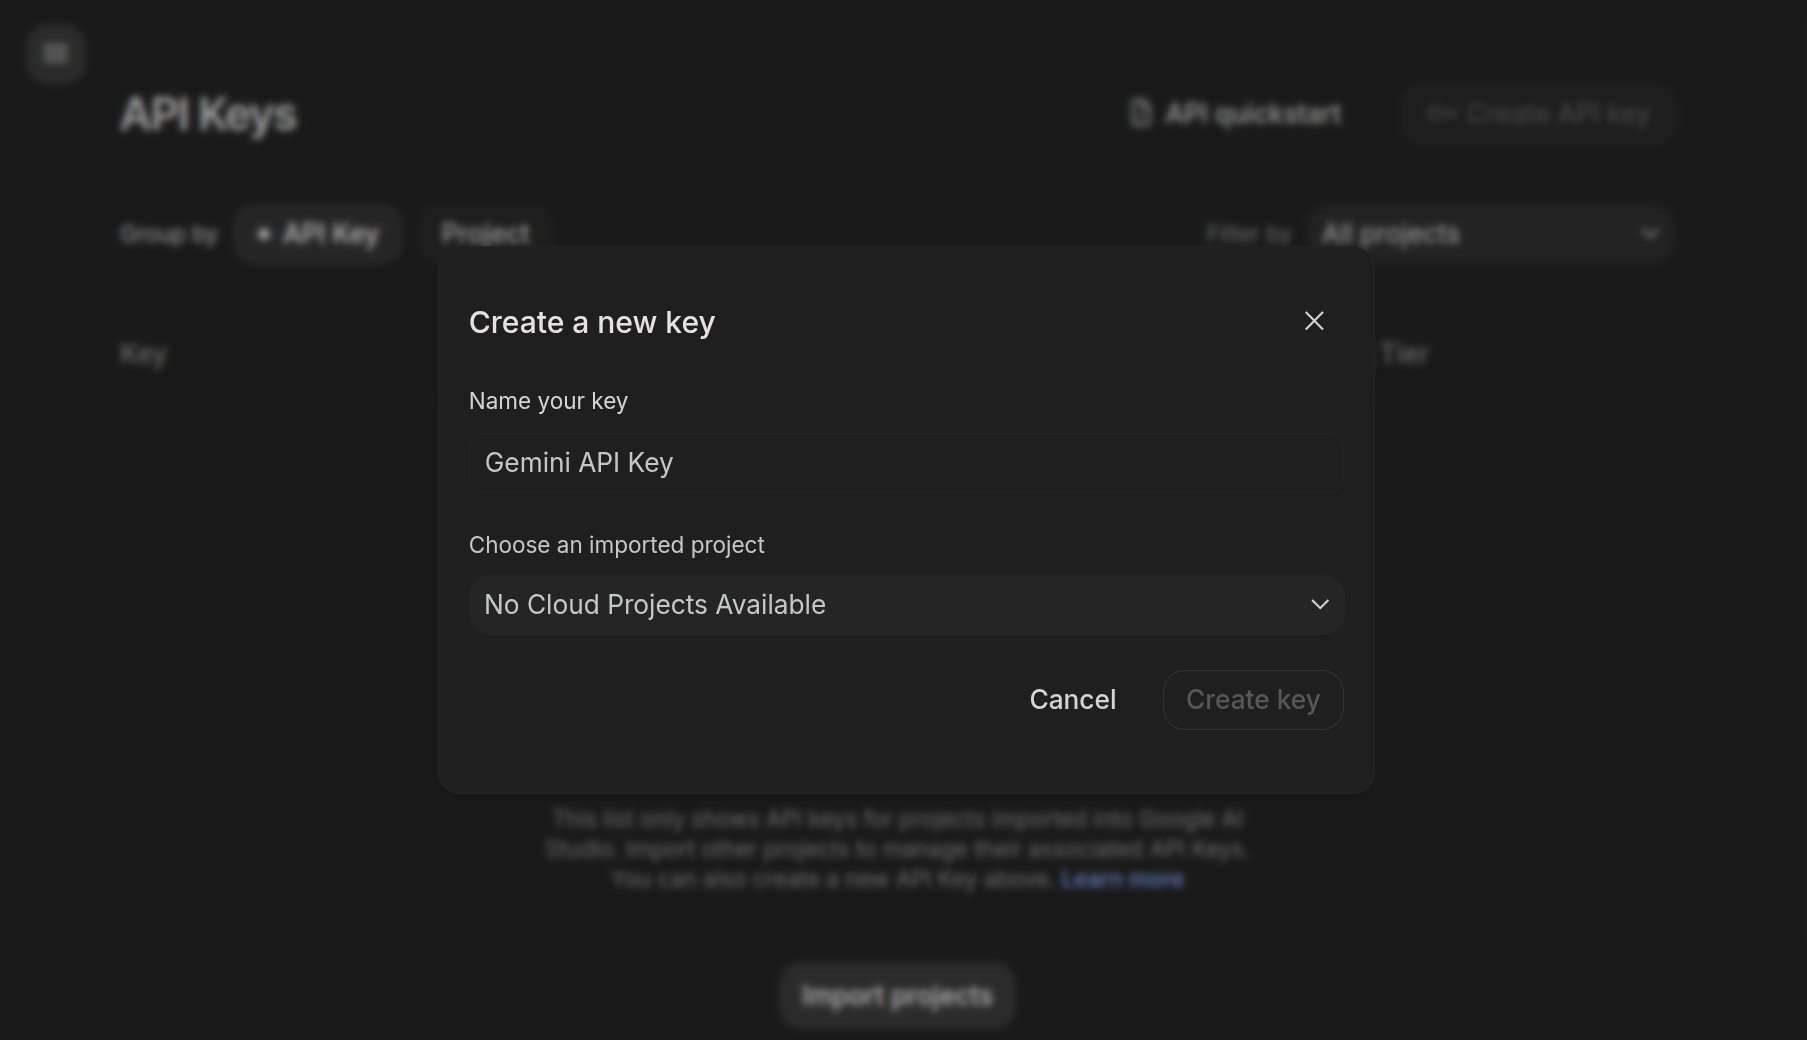
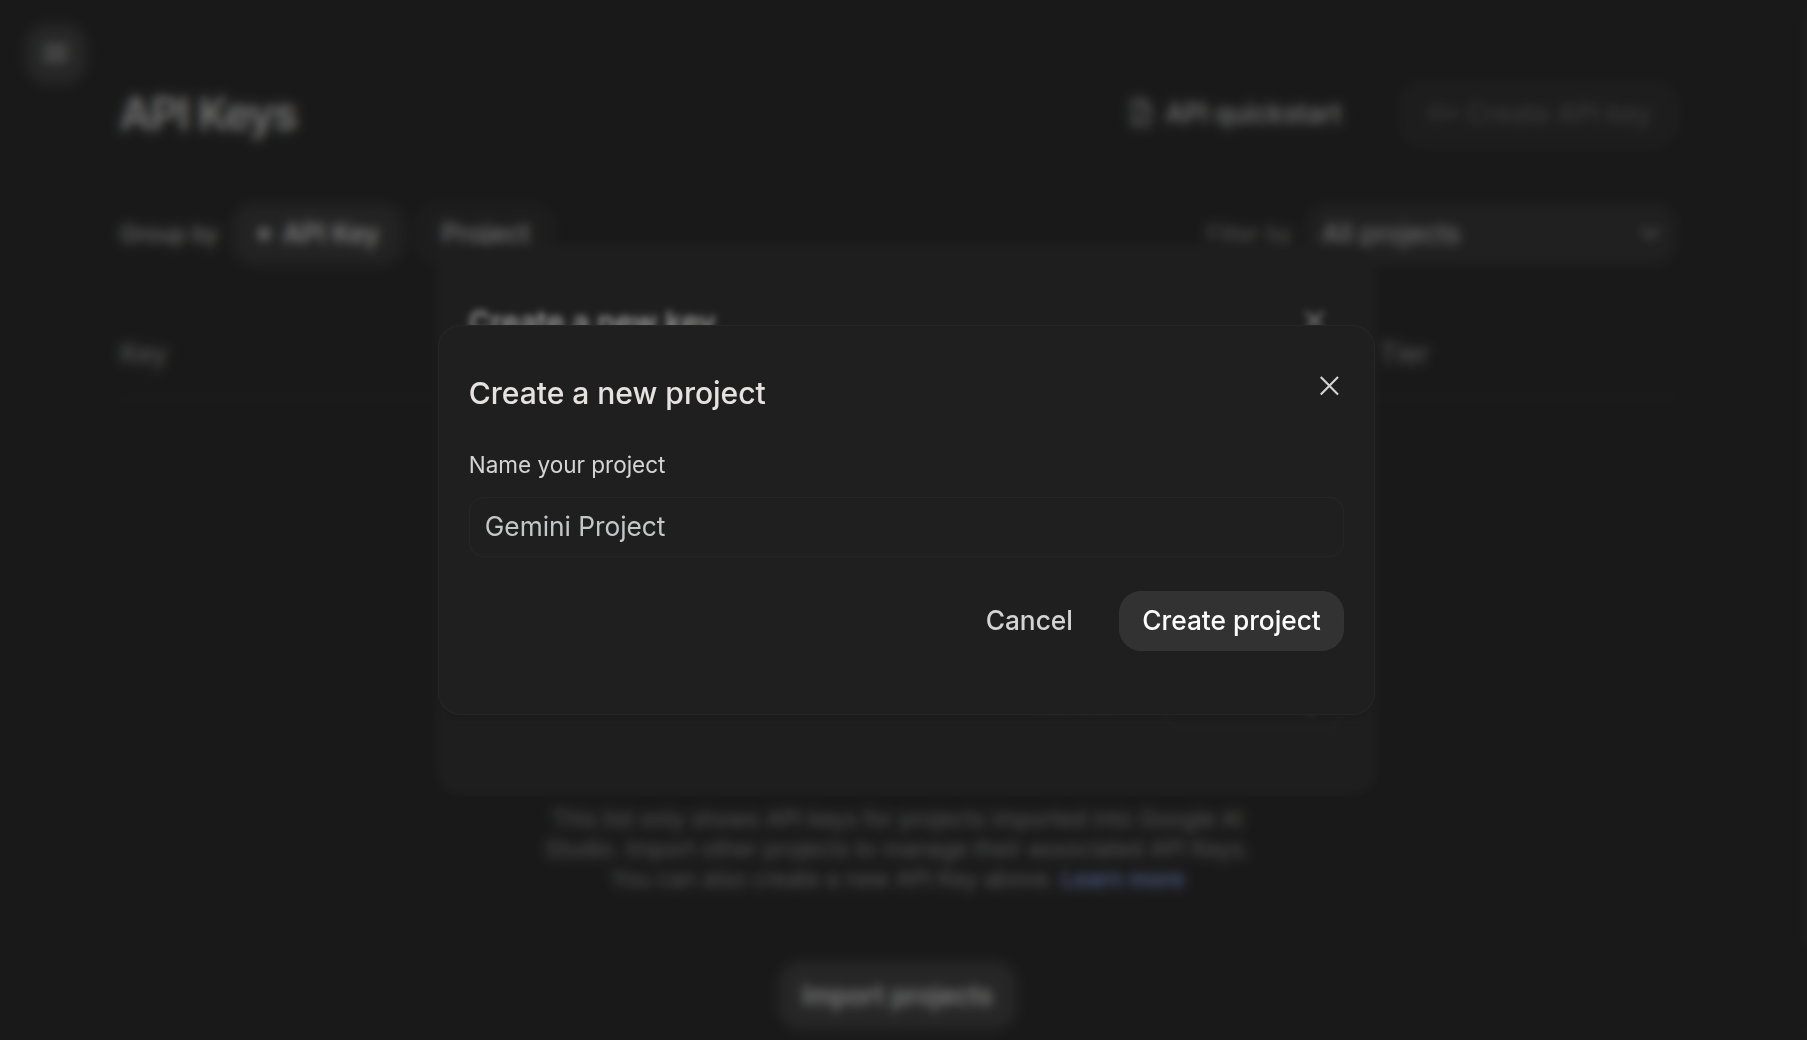
Create a Google Cloud project when Google AI Studio prompts you. The API key belongs to this project.
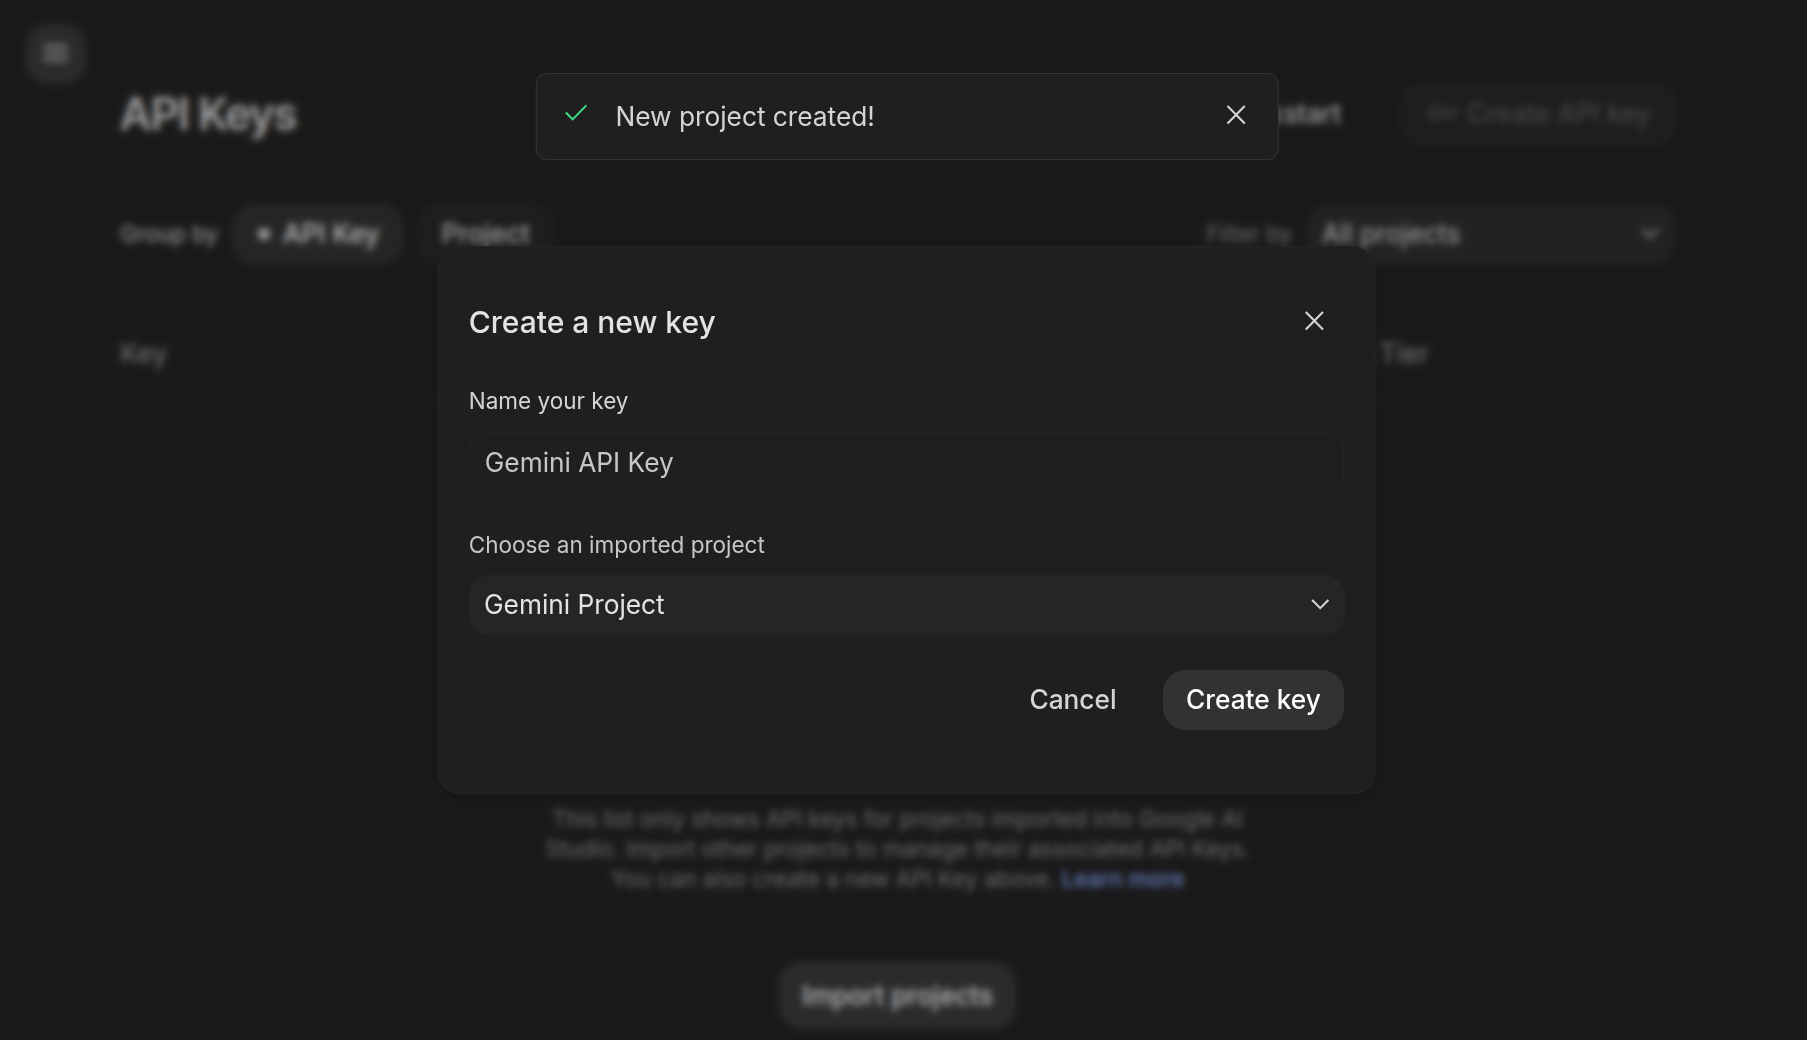
Note that an institutional Google account, such as a school account, may be restricted from creating Google Cloud projects.
-
Copy the API key. Then edit the
opencode.jsonconfiguration file described in Setting up the OpenCode configuration file. If you use a project configuration file, add it to your.gitignore. The file will contain your Gemini API key and should not be added to your Git repository. -
Add this entry inside the
providerobject, replacingxxxxxxxxxxxxxxwith your API key. This list includes the text-generation models from your rate-limit page with a positive free-tier RPD; it excludes embeddings, image-generation models, and Gemini 2.x models."google": { "npm": "@ai-sdk/openai-compatible", "name": "Google Gemini", "options": { "baseURL": "https://generativelanguage.googleapis.com/v1beta/openai/", "apiKey": "xxxxxxxxxxxxxx" }, "whitelist": [ "gemini-3.6-flash", "gemini-3.5-flash", "gemini-3.5-flash-lite", "gemini-3-flash-preview", "gemini-3.1-flash-lite", "gemma-4-26b-it", "gemma-4-31b-it" ], "models": { "gemini-3.6-flash": { "name": "Gemini 3.6 Flash" }, "gemini-3.5-flash": { "name": "Gemini 3.5 Flash" }, "gemini-3.5-flash-lite": { "name": "Gemini 3.5 Flash Lite" }, "gemini-3-flash-preview": { "name": "Gemini 3 Flash" }, "gemini-3.1-flash-lite": { "name": "Gemini 3.1 Flash Lite" }, "gemma-4-26b-it": { "name": "Gemma 4 26B" }, "gemma-4-31b-it": { "name": "Gemma 4 31B" } } }, -
Close and re-open OpenCode. Use
/modelsto select a model under the Google Gemini provider.
If your Google Cloud project has no billing account attached, your API requests stay on Google’s free tier. If you attach billing, requests can incur charges. It is very important to set quotas and spending controls before creating an API key in a billed project!!! A compromised API key or an agent that makes excessive requests can otherwise create an extremely large bill which you would be personally responsible for.
You can check your usage and the rate limit for each model at Google AI Studio’s rate-limit page.
Other paid providers
You can get really far with just those free providers! But if you already have a paid subscription to another AI provider, you can also use it in OpenCode.
OpenAI ChatGPT
If you have a paid ChatGPT Plus/Pro subscription, you can connect it to OpenCode.
- In the OpenCode TUI, type
/connectand hit Enter. - Search for and choose OpenAI.
- Choose ChatGPT Plus/Pro (browser). OpenCode will open your browser for authentication.
- After authentication completes, use
/modelsto select an OpenAI model.
Note: If you are doing this on a “headless” server with no GUI, first go to https://chatgpt.com/#settings/Security and make sure Enable device code authorization for Codex is turned on. Then choose ChatGPT Pro/Plus (headless). Open https://auth.openai.com/codex/device in your browser and enter the code OpenCode displays.
OpenAI applies 5-hour and weekly rate limits to your subscription. You can check how much of your allowance is exhausted, and when your usage resets, in the usage analytics.
Using OpenCode with Portkey
To support your work, we have arranged access to Anthropic models (Claude Haiku 4.5, Claude Sonnet 4.5, Claude Open 4.5, Claude Sonnet 4.6, Claude Open 4.6) via NYU’s AI gateway on Portkey.
Each student will have a weekly budget. The limit resets weekly, you cannot use more than your allocated budget in one week even if you use less than this budget in some other weeks.
Note: You can only access NYU AI’s gateway if you are either on NYU network (e.g. NYU WiFi) or connected to NYU VPN. Follow the instructions at NYU VPN to set up VPN access for off-campus use.
To configure OpenCode for NYU’s AI gateway on Portkey:
- Log in to Portkey at https://app.portkey.ai/:
- Choose Single sign-on,
- Put in your NYU email (netID@nyu.edu),
- Choose the RTS organization
- and authenticate.
- Use the organization switcher in the bottom left to switch to “TSOE - Tandon School of Engineering”, and then the workspace switcher in the top left to switch to “ML systems engineering and operations” workspace.
- Click on “API keys” from the menu on the left side.
- Click “Create” on the top right.
- Set the API key type to “User” and then create your key. When the key is displayed, copy the key and keep it in a safe location.
Next, you need to configure OpenCode to access this provider. Edit the opencode.json configuration file described in Setting up the OpenCode configuration file. Add this entry inside the provider object, replacing xxxxxxxxxxxxxx with your API key. If you add another provider after Portkey, keep the comma after the closing }; if Portkey is the last provider, remove that comma.
"portkey": {
  "npm": "@ai-sdk/openai-compatible",
  "name": "Portkey",
  "options": {
    "baseURL": "https://ai-gateway.apps.cloud.rt.nyu.edu/v1",
    "headers": {
      "x-portkey-api-key": "xxxxxxxxxxxxxx"
    }
  },
  "models": {
    "@vertexai/anthropic.claude-haiku-4-5@20251001": {
      "name": "Claude Haiku 4.5 (20251001)"
    },
    "@vertexai/anthropic.claude-sonnet-4-5@20250929": {
      "name": "Claude Sonnet 4.5 (20250929)"
    },
    "@vertexai/anthropic.claude-opus-4-5@20251101": {
      "name": "Claude Opus 4.5 (20251101)"
    },
    "@vertexai/anthropic.claude-sonnet-4-6": {
      "name": "Claude Sonnet 4.6"
    },
    "@vertexai/anthropic.claude-opus-4-6": {
      "name": "Claude Opus 4.6"
    }
  }
},
Close and re-open opencode. Use /models to list the available models, and confirm that the Claude models appear under the Portkey provider.
When you are connected to NYU network, use /models to switch to a Claude Haiku model via Portkey, and confirm that you can chat with it.
You can use these in OpenCode alongside the free models from the OpenCode provider, free models from other services like Kilo or OpenRouter, or other AI subscriptions you might already have (e.g. Github Copilot, OpenAI Plus/Pro).
Using OpenCode with NRP
The National Research Platform (NRP) provides access to hosted AI models through its inference service. To use NRP, you must first sign in and receive access to an NRP namespace from an instructor or supervisor. Faculty members can request their own namespace and administrator privileges.
After you have been added to a namespace, create an API key at https://nrp.ai/llmtoken/.
Then edit the opencode.json configuration file described in Setting up the OpenCode configuration file. Add this entry inside the provider object, replacing xxxxxxxxxxxxxx with your NRP API key.
"NRP": {
  "npm": "@ai-sdk/openai-compatible",
  "name": "NRP",
  "options": {
    "baseURL": "https://ellm.nrp-nautilus.io/v1",
    "apiKey": "xxxxxxxxxxxxxx"
  },
  "models": {
    "qwen3": {
      "name": "Qwen3",
      "limit": { "context": 1010000, "output": 32768 },
      "modalities": { "input": ["text", "image", "video"], "output": ["text"] },
      "variants": {
        "thinking": { "chat_template_kwargs": { "enable_thinking": true, "preserve_thinking": true } },
        "instruct": { "chat_template_kwargs": { "enable_thinking": false } }
      }
    },
    "qwen3-small": {
      "name": "Qwen3 Small",
      "limit": { "context": 1010000, "output": 32768 },
      "modalities": { "input": ["text", "image", "video"], "output": ["text"] },
      "variants": {
        "thinking": { "chat_template_kwargs": { "enable_thinking": true, "preserve_thinking": true } },
        "instruct": { "chat_template_kwargs": { "enable_thinking": false } }
      }
    },
    "gpt-oss": {
      "name": "GPT-OSS 120B",
      "limit": { "context": 131072, "output": 32768 },
      "modalities": { "input": ["text"], "output": ["text"] }
    },
    "gemma": {
      "name": "Gemma 4 31B",
      "limit": { "context": 262144, "output": 32768 },
      "modalities": { "input": ["text", "image", "video"], "output": ["text"] },
      "variants": {
        "thinking": { "chat_template_kwargs": { "enable_thinking": true } },
        "instruct": { "chat_template_kwargs": { "enable_thinking": false } }
      }
    },
    "gemma-small": {
      "name": "Gemma 4 12B",
      "limit": { "context": 262144, "output": 32768 },
      "modalities": { "input": ["text", "image", "video", "audio"], "output": ["text"] },
      "variants": {
        "thinking": { "chat_template_kwargs": { "enable_thinking": true } },
        "instruct": { "chat_template_kwargs": { "enable_thinking": false } }
      }
    },
    "kimi": {
      "name": "Kimi K2.7 Code",
      "limit": { "context": 131072, "output": 32768 },
      "modalities": { "input": ["text", "image", "video"], "output": ["text"] }
    },
    "glm-5": {
      "name": "GLM-5",
      "limit": { "context": 300000, "output": 32768 },
      "modalities": { "input": ["text"], "output": ["text"] },
      "variants": {
        "thinking": { "chat_template_kwargs": { "enable_thinking": true, "clear_thinking": false } },
        "instruct": { "chat_template_kwargs": { "enable_thinking": false } }
      }
    },
    "deepseek-v4-flash": {
      "name": "DeepSeek V4 Flash",
      "limit": { "context": 1048576, "output": 32768 },
      "modalities": { "input": ["text"], "output": ["text"] },
      "variants": {
        "thinking": { "chat_template_kwargs": { "enable_thinking": true } },
        "instruct": { "chat_template_kwargs": { "enable_thinking": false } }
      }
    },
    "minimax-m2": {
      "name": "MiniMax M2",
      "limit": { "context": 204800, "output": 32768 },
      "modalities": { "input": ["text"], "output": ["text"] }
    }
  }
},
Close and re-open OpenCode. Use /models to select an NRP model and test the connection.
Add Playwright MCP
You may want to also add the Playwright MCP to your OpenCode configuration - this will enable your AI agent to open a browser and interact with your browser-based service in order to validate its changes.
To add the Playwright MCP, open your opencode.json config file again. Between the $schema and provider lines,
   "$schema": "https://opencode.ai/config.json",
   "provider": {
paste the following:
  "mcp": {
    "playwright": {
      "type": "local",
      "command": [
        "npx",
        "@playwright/mcp@latest"
      ],
      "enabled": true
    }
  },
Close and re-open OpenCode. Inside OpenCode, run
/mcps
and confirm that Playwright is listed. Test it - try prompting it to open a URL in a browser and click on a particular UI element.
Best practices for modifying large codebases with AI agents
Now, you are ready to use OpenCode for real work! But first, it’s worth noting some best practices for coding with AI agents. The following diagram illustrates a common workflow:

When writing code by hand, your human effort is concentrated in the “implement”, “deploy”, and “verify” stages. But when you are working with an AI agent, you are going to largely offload those stages to the AI agent. Instead, your human effort is concentrated in the “plan” and “review” stages - and ideally, mostly in the “plan” stage and the “review” stage is trivial, if you have set yourself up for success.
Under these circumstances, you’re not going to want to iterate on code (e.g. prompt the agent to write code, review it, prompt the agent to change it because it doesn’t match your intent, repeat, etc), because iterating on code:
- is expensive in terms of dollar cost - letting the agent generate code again and again will quickly eat up your budget!
- is expensive in terms of human cognitive effort - rather than reviewing lots of code, it is a lot easier to instead iterate on the plan in natural language, and let the agent generate code only once your intent is clearly communicated and well specified.
Virtually every session should start in “plan” mode (use the Tab key in OpenCode to toggle between “plan” and “build” mode), and only progress to “build” once you have clearly communicated intent.
Furthermore, to reduce the human effort required in the “review” stage, you will probably want to break the implementation up into tiny, individually verifiable chunks. You’ll go through that entire workflow illustrated above - from “plan” to “merge” for each tiny chunk before moving on to the next. This makes both “plan” (communicating your intent) and “review” (making sure the implementation matches your intent and doesn’t take “shortcuts”) much easier.
In between “plan” and “review”, you will want the agent to be able to implement, deploy, and verify its own work. You don’t want human effort to be required in that stage, since the model may iterate on “implement > deploy > verify” several times, and it should be able to do this independently without your intervention. You can give it instructions to access your “dev” deployment (e.g. “Use bash to SSH to cc@A.B.C.D where the service is deployed in a Docker container”) so that it can test.
Here are some other “rules” that I think make AI coding easier:
- Rule 1: Always start from a working system state. Get a working “dev” deployment up and running before asking an AI agent to add any features! This way, the AI agent can test its work in a real deploymment, and know if it breaks the service.
- Rule 2: Change one smallest meaningful observable unit at a time. Break the work into chunks, where each chunk is a complete unit that changes behavior in an observable way (whether through UI, logs, or something else). This makes the human effort involved in “plan” and “review” much simpler.
- Rule 3: Isolate each unit in its own branch and merge when validated. Ask the agent to create a branch for each “chunk” of work, and to merge each branch after review. This makes review much simpler. It also makes it easy to abandon a “chunk” of work (or a sequence of them!) and start it again, or to take a different approach.
- Rule 4: Define success (pass/fail) before coding. As part of the “plan” stage, you should know how you can tell if it worked! This might mean expected UI behavior, specific log lines in output, or something else. Make sure you communicate this, too, so that the agent can verify its work.
- Rule 5: Put the agent in the eval loop. The coding agent should evaluate its own work: push commits to its branch, pull the branch in the “dev” deployment environment, de-deploy, and verify. This way, it can go back and fix any mistakes independently.
- Rule 6: Optimize for human review throughput. Finally, we want to plan our workflow around making “review” easy. This is because review is typically the bottleneck in AI coding. If we invest effort in planning so that intent is clear, keep each diff small so it is easy to see if it follows through on the intent, and have the agent check for evidence of success in the “verify” stage, then approval decisions are obvious.
Some other helpful practices include:
Switch between models (small models for small tasks, large models for complex tasks). For example, Claude models are “ordered”. From simplest/fastest/cheapest to most capable for complex tasks/slowest/most expensive, they are: Haiku, Sonnet, Opus. Current costs in Portkey are:
| Model ID | Input $/M | Output $/M |
|---|---|---|
claude-haiku-4-5 |
$1.00 | $5.00 |
claude-sonnet-4-5 |
$3.00 | $15.00 |
claude-sonnet-4-6 |
$3.00 | $15.00 |
claude-opus-4-5 |
$5.00 | $25.00 |
claude-opus-4-6 |
$5.00 | $25.00 |
so you can stretch your budget farther if you let Haiku handle simple tasks, for example.
Write and maintain an AGENTS.md to help you keep context across sessions, but keep it small. For example, instead of telling the model at the beginning of each session:
You are working on the BabyBuddy repo.
It is running in a Docker container at 129.114.26.135.

Workflow requirements:
1) Make code changes locally in this repository in a new feature branch.
2) Commit only scoped files for this chunk.
3) Push your changes to the feature branch.
4) Use bash to SSH to cc@129.114.26.135, pull the same branch on remote, and validate.

Validation requirements:
- Verify behavior in browser at http://129.114.26.135
- Or verify with docker logs on remote if browser validation is not enough
- Validation should show that changes work as expected, not only that code runs.
you could put all this in an AGENTS.md file in the project root. (You can commit this to Git, too!) The model will read this in at the beginning of a session.
Finally, keep context clean. The entire conversation history is sent to the model as input each time you add a prompt. The cost increases and the model quality degrades as this history gets longer. Start a new session when you are starting a new task; this usually improves results, lowers cost, and makes it easier for the model to stay aligned with your actual intent.